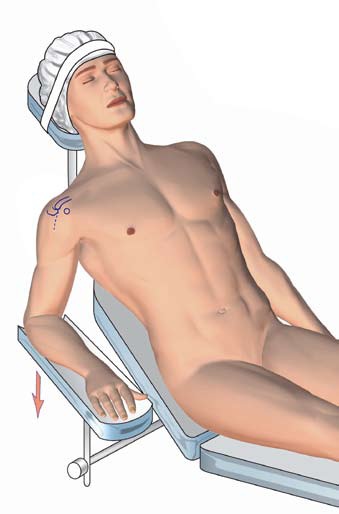
The half-sitting position is common to many shoulder interventions, including shoulder prostheses.
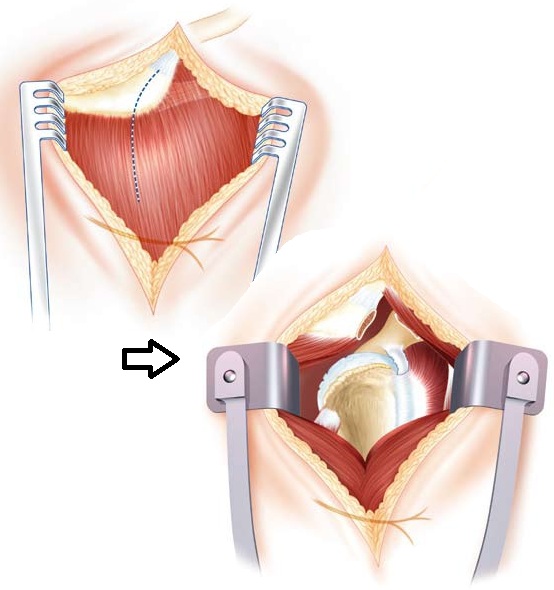
An inverted prosthesis can easily be implanted by an upper shoulder approach, which gives an interesting view of the glenoid of the scapula (posterior).
This route is also used in osteosynthesis fractures of the upper end of the humerus including centro-medullary nailing because recovery of the major tubercle often retracted backwards is facilitated (attracted by the external rotator tendons) if copare with a delto-pectoral way.
- On the other hand, the superior way is not expansive, it can not be extended too far down, otherwise the axillary nerve will be damaged.If the intervention seems difficult from the outset or if it is a resumption of prosthesis (or from the outset for some surgeon who prefers) it is better to approach the shoulder delto-pectoral which remains the royal way as feasible whatever the intervention envisaged (possible extension all along the humerus)
The delto-pectoral path is detailed in the chapter total anatomical prosthesis.
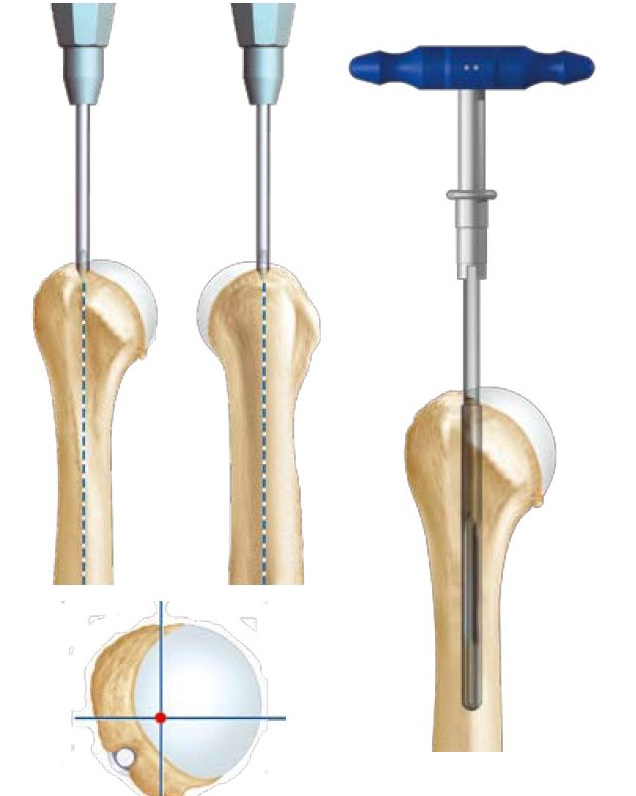
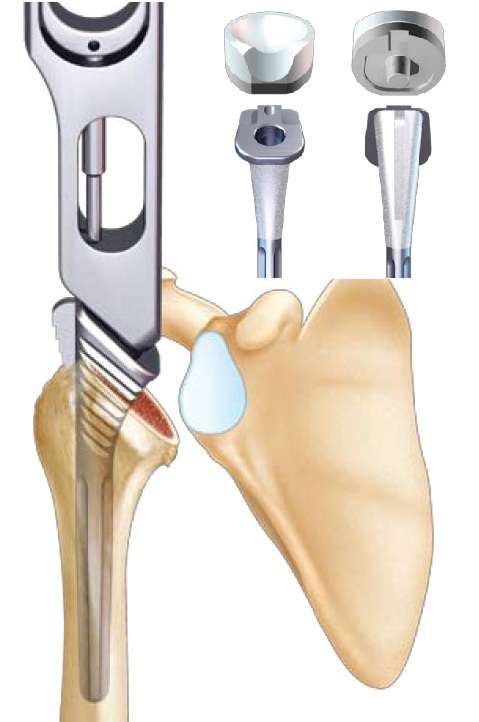
Trepanation of the humerus to find the axis of the medullary canal (hollow) of the humerus. Installation of the reamer (surmounted by the blue handle) which allows to work the canal to the correct diameter and allows the introduction of the cutting guide.
This material is made by the ‘ancillary’ prosthesis (all tools and instruments that allow the installation of a prosthesis); it is specific for each prosthesis.
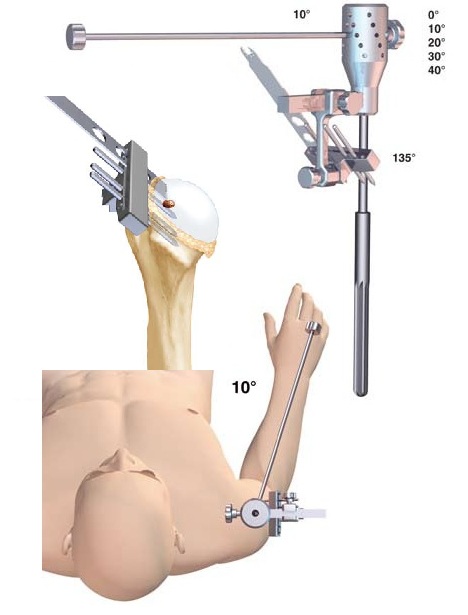
Fixing of the cutting guide in general with a retroversion of 10 degrees (does not correspond corresponds to the anatomical retroversion of the head which is between 20 to 30 degrees) then ostetomy of the head with the help of an oscillating saw (once the centro-medullary guide removed)
The size of the head does not matter on this type of prosthesis because there are only 2 sizes of glenosphere (36 mm and 39 mm).
Figure 1: case of a configuration requiring a centered head
Figure 2: case of a configuration requiring an eccentric configuration with essentially anterior coverage (close to the relief of the small tuberosity)
Once the choice of metal head is made, the implants are opened sterilely (stem and humeral head).
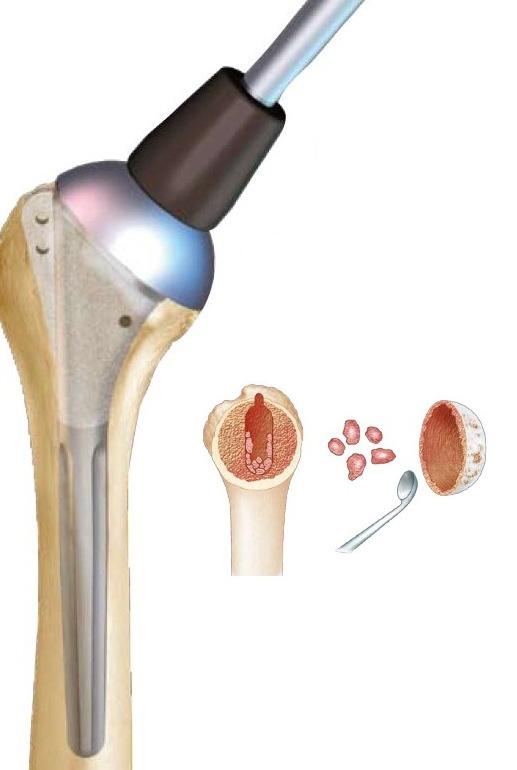
The impaction of the stem is done if possible without cementation by surgical cement, then a graft of the metaphyseal zone of the humerus (broad part under the head) is carried out or the stem is covered with an osteo-integrable layer (allows to cling to the bone). The necessary cancellous bone is taken from the hollow of the removed humeral head.
A cement seal is preferable in the elderly person or in case of average primary holding of implants.
Once the humerus has been cleared of its head, test probes and stems are used to select the correct sterile final implant size.
The adapted size has most often been evaluated on preoperative radiographs using prosthesis rod layers.
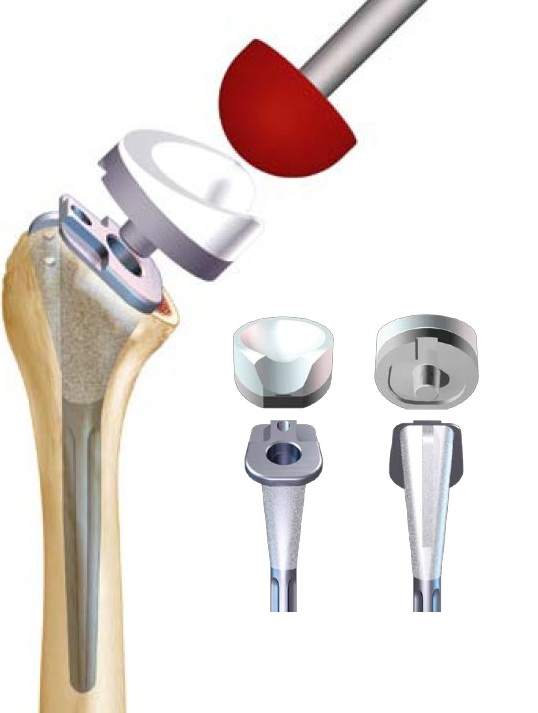
The stem that we use is common to all prosthetic configurations (humeral simple, anatomical, inverted). It is called ‘modular’.
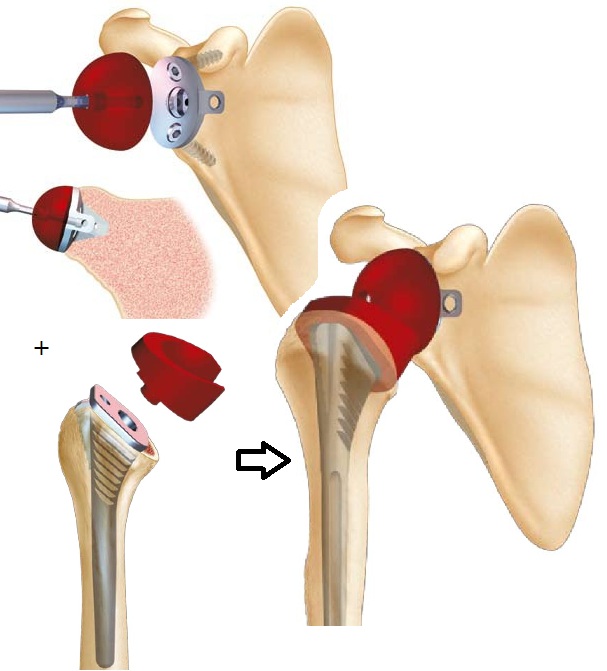
The design of the humeral inverted base is reproduced in the drawing against, has a metal base and a polyethylene cut down to not conflict with the glenoid.
The definitive inverted humeral base is only put in place last after all the steps concerning the glenoid.
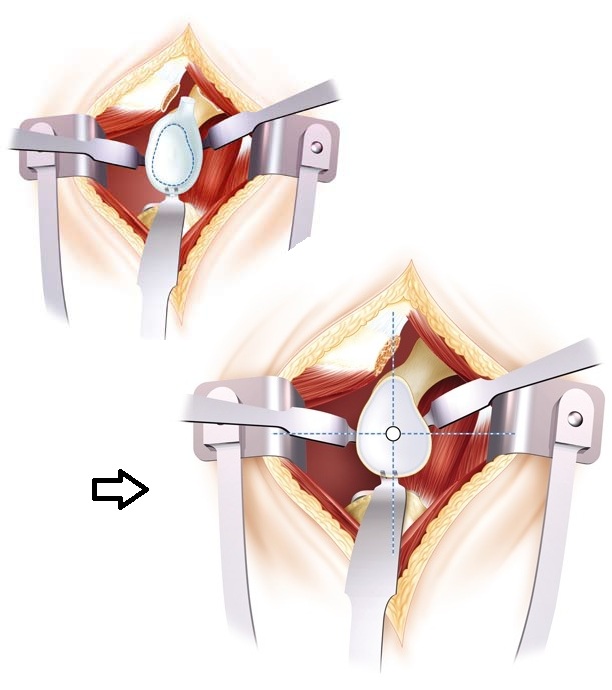
Glenoid time requires exposure of the glenoid, a very important time because the vision of this bone surface is relatively limited and causes difficulties in appreciating the axis and the actual limits of the surface area for receiving an implant (especially there are many osteophytes or parrot beaks that mimic the surface of the glenoid.
In general this time requires the section or even the resection of the bead and the joint capsule.
Several bent spacers are positioned at the neck of the scapula and facilitates the exposure of the glenoid.
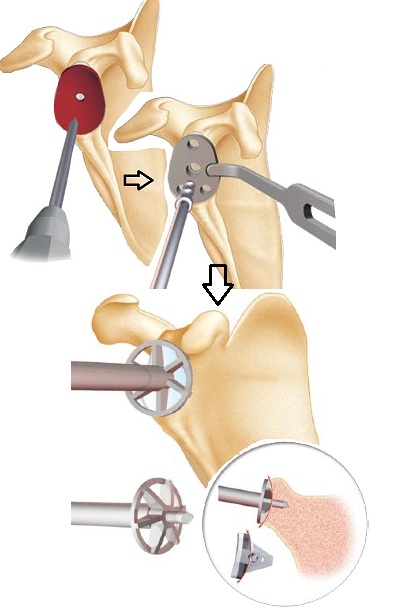
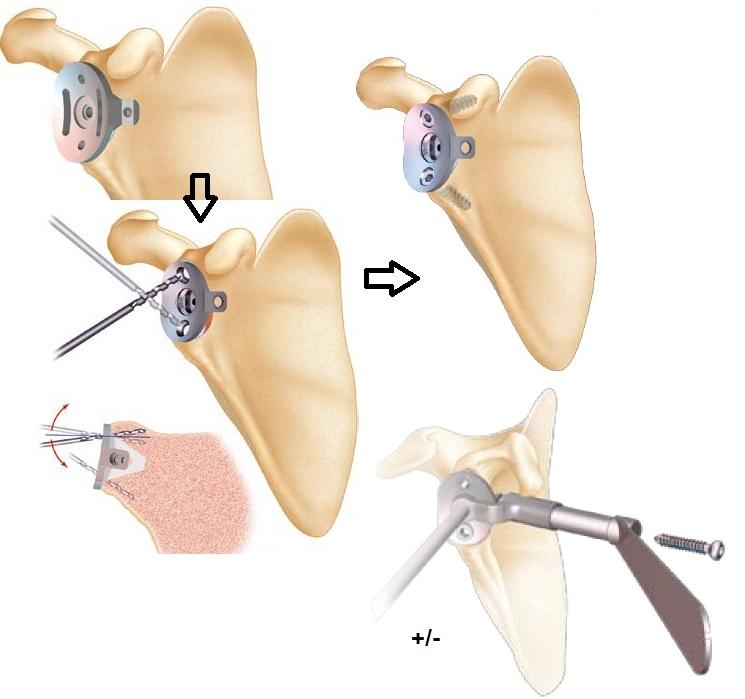
Once the glenoid properly exposed, and taking care of its anteroposterior axis (retroversion or anteversion); a first tunnel is made at its center, which then serves as a guide for the glenosis of the glenoid. This is the crucial time in order to correctly place the definitive implant and to avoid any rapid loosening factor or fracture of the implant. glenoid.
Glenarization is done using a rotary bur driven by a surgical motor. The goal is to reach the subchondral bone (under the cartilage) and create a concave surface identical to the shape of the PE implant.
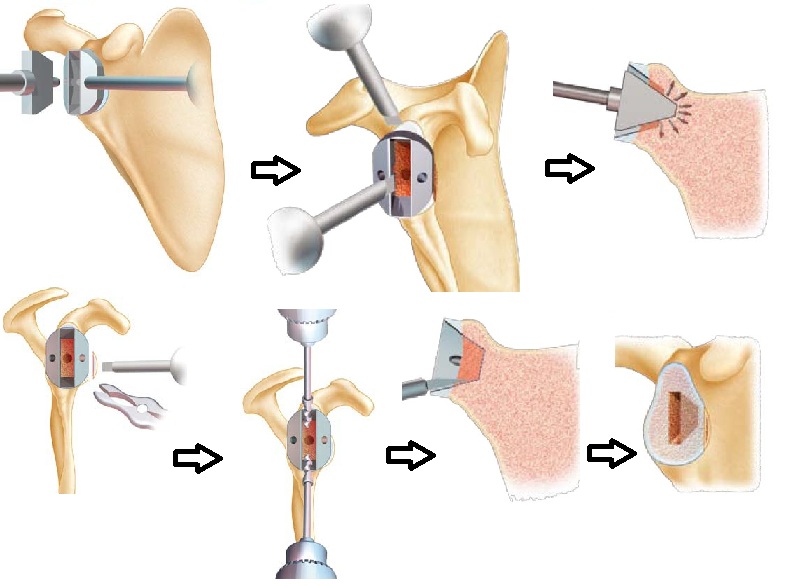
The metal-back is anchored in the glenoid by a keel, which requires the preparation of a formwork adapted exactly to the keel.
This step is the most delicate because it is imperative to apprehend the anatomical variations of the glenoid (retroversion, anteversion, asymmetrical wear, loss of substance etc …) otherwise the implant will not hold …
Below are summaries of the steps necessary for the realization of the formwork.
These steps are identical to those of the implantation of a metal-back during the realization of a total anatomical prosthesis (see dedicated chapter)
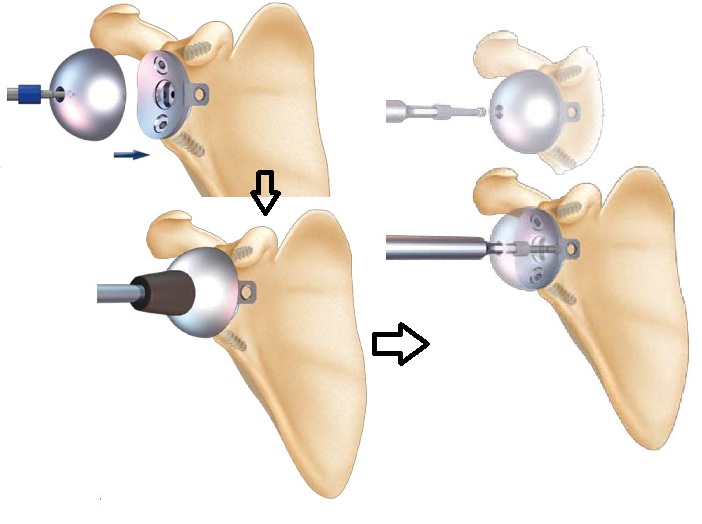
Once the final metaglene (metal glenoid) is in place, plastic test implants are positioned and each configuration is tested to define the one that allows the larger movements without instability of the prosthesis (a prosthesis that is not sufficiently tight Requires either a larger glenosphere or a higher humeral base).
At this stage the stem is not permanently fixed.
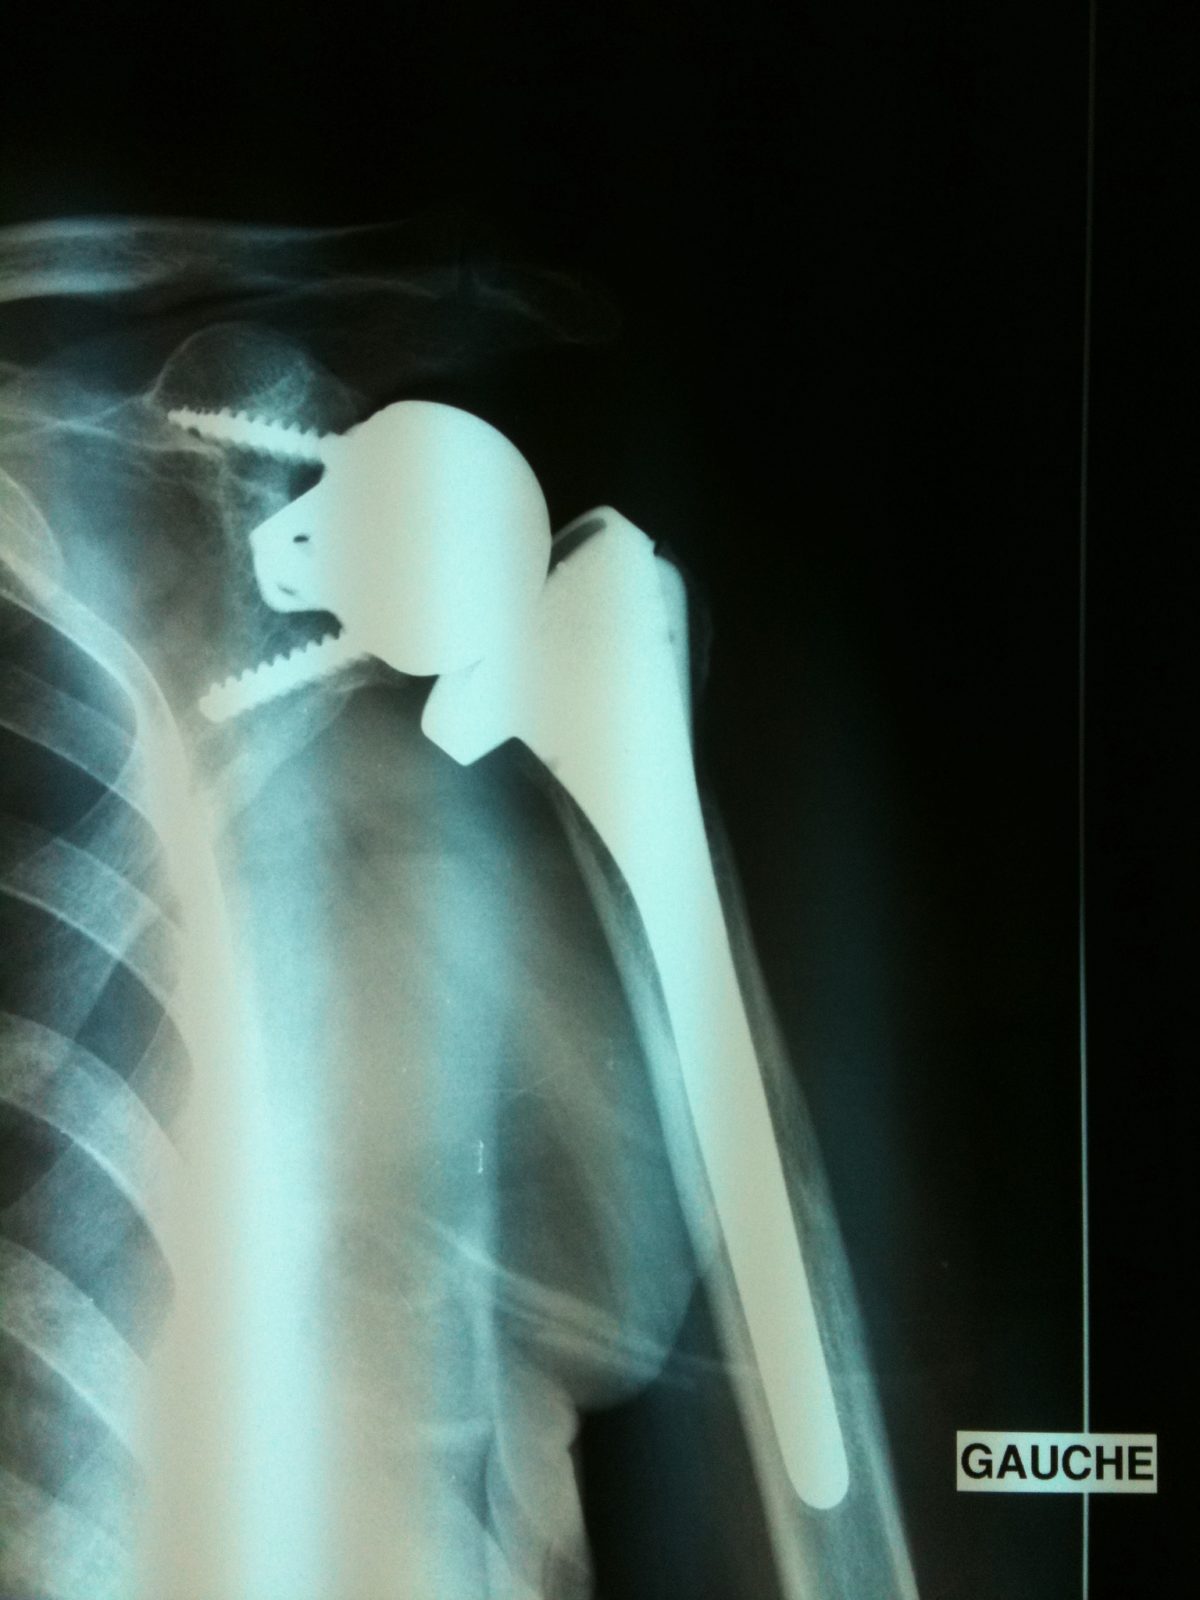
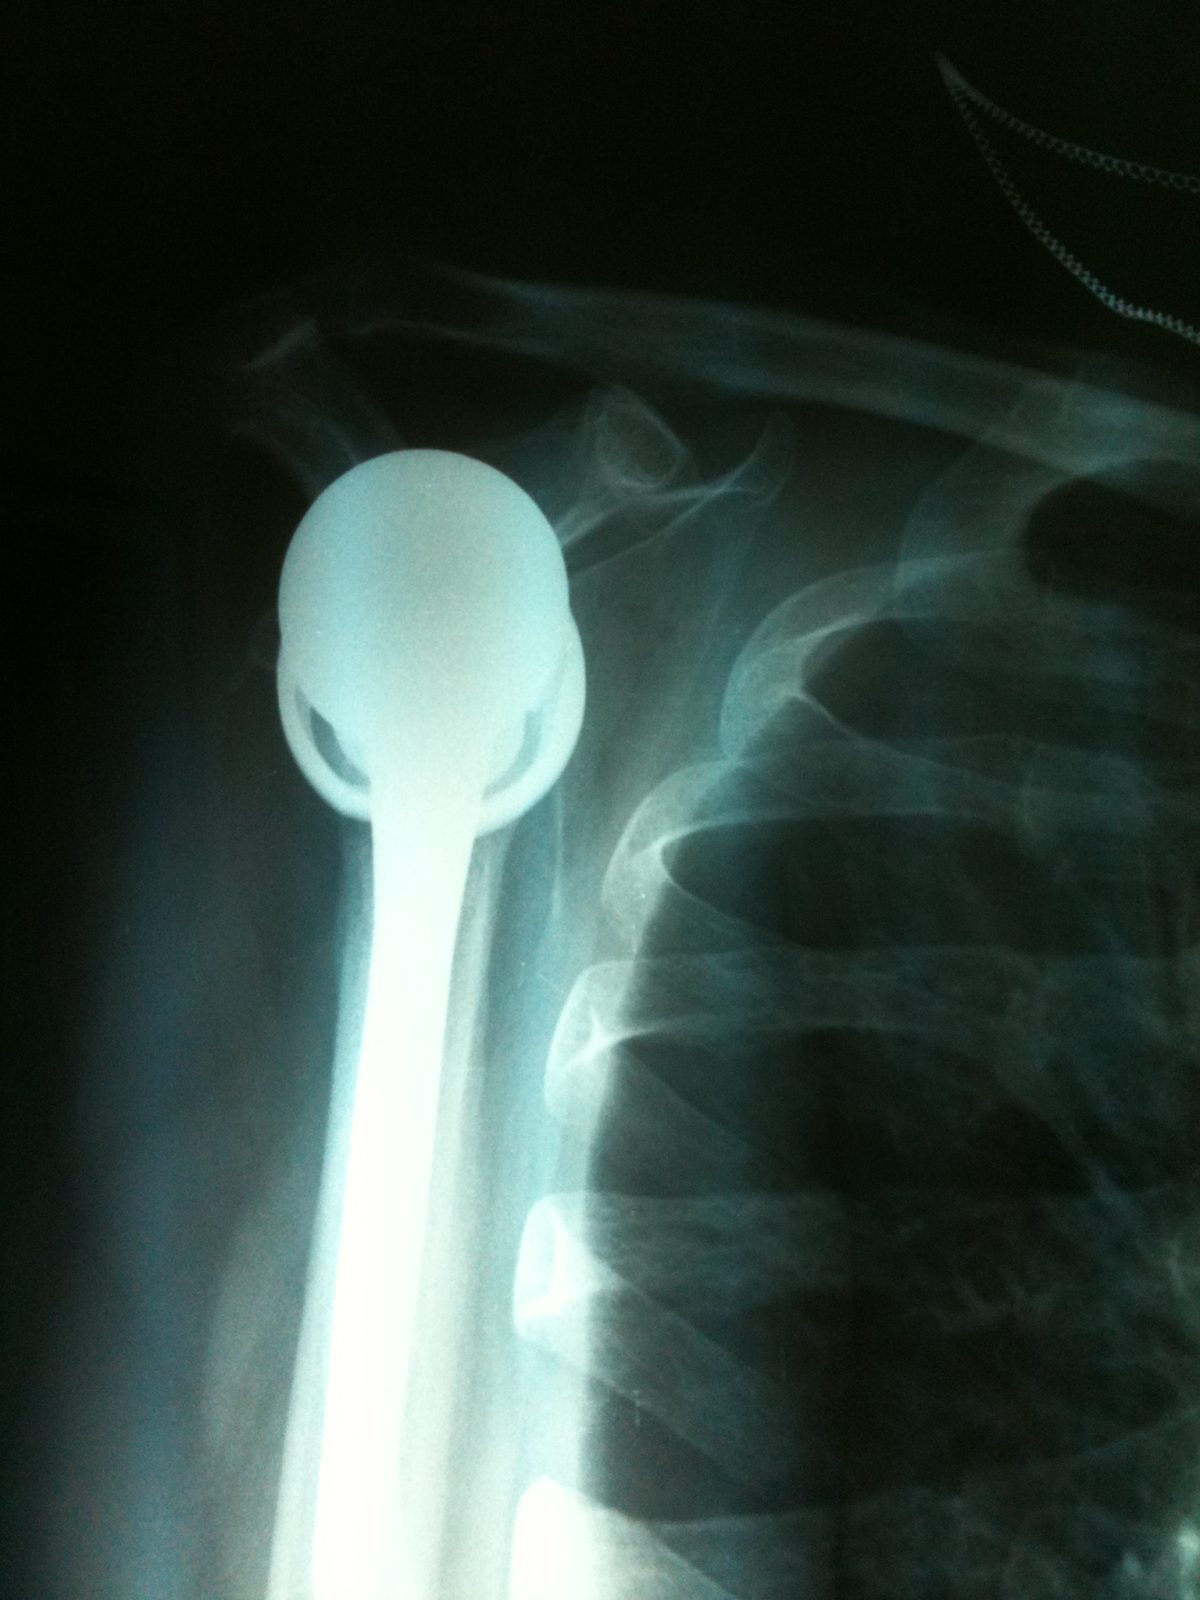
Once the optimal configuration is chosen, the sterile final implants are requested and opened in their sterile pouch, the first implant is the glenosphere (opposite) by impaction and central screwing.
Below are the steps concerning the humeral stem.
The impaction of the stem is done if possible without cementation by surgical cement, then a graft of the metaphyseal zone of the humerus (broad part under the head) is carried out or the stem is covered with an osteo-integrable layer (allows to cling to the bone). The necessary cancellous bone is taken from the hollow of the removed humeral head.
A cement seal is preferable in the elderly person or in case of average primary holding of implants.
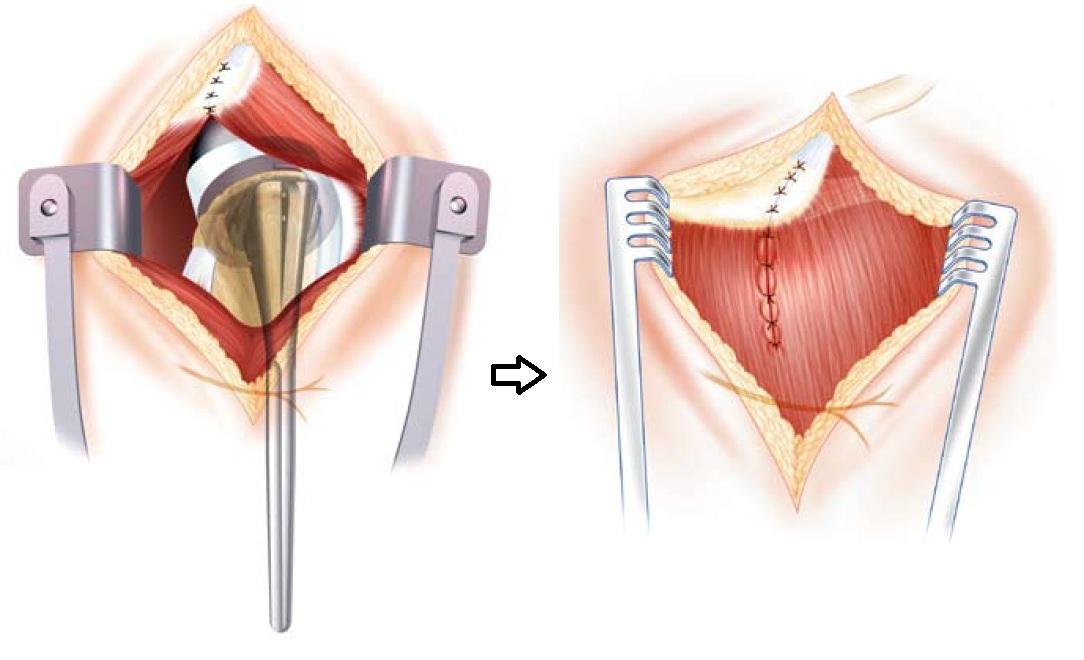
Finally the closure is achieved by repairing if necessary the detachment of the anterior deltoid at the level of the acromion and by referamant his muscular body. An aspirating drain is put in place for 2 days.

