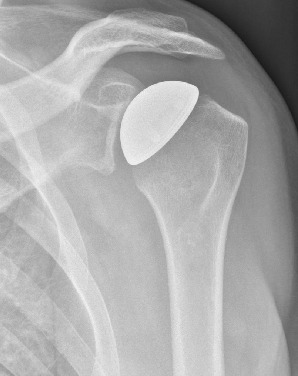
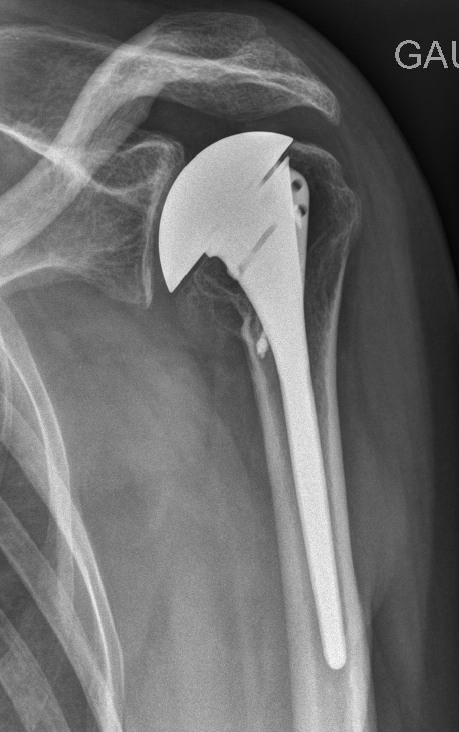
It is the lightest shoulder prosthesis. The principle is to replace only the partial sphere covered with cartilage of the humeral head. The same type of implant is used in other joints such as hip, knee, ankle, elbow etc … No implant is placed on the glenoid.
Common to partial dentures
no constraints with the mirror implant on the glenoid (as in a total prosthesis) so no risk of loosening of the glenoid.
Allows a totalization of the prosthesis in the future on a very little damaged glenoid
Resurfacing
Minimally invasive (except section of the subscapular tendon), not very impressive
apparently easy to do especially if the head is slightly deformed
easy to remove if problem or subsequent summation
very suitable for necrosis of the humeral head on initially healthy shoulder or to young patients
Treats only one side of an osteoarthritis (if it concerns the two articular surfaces in mirror) with as risks:
– persistence of pain certainly alleviated but sometimes lasting (6 months often)
– the possible decompensation of a glenoiditis (inflammation of the glenoid) with aggravation of the pain +++ which imposes a reintervention of totalization
Technically much more difficult in case of very deformed head or destroyed with risk of malposition or instability
Surgical steps of partial shoulder prostheses
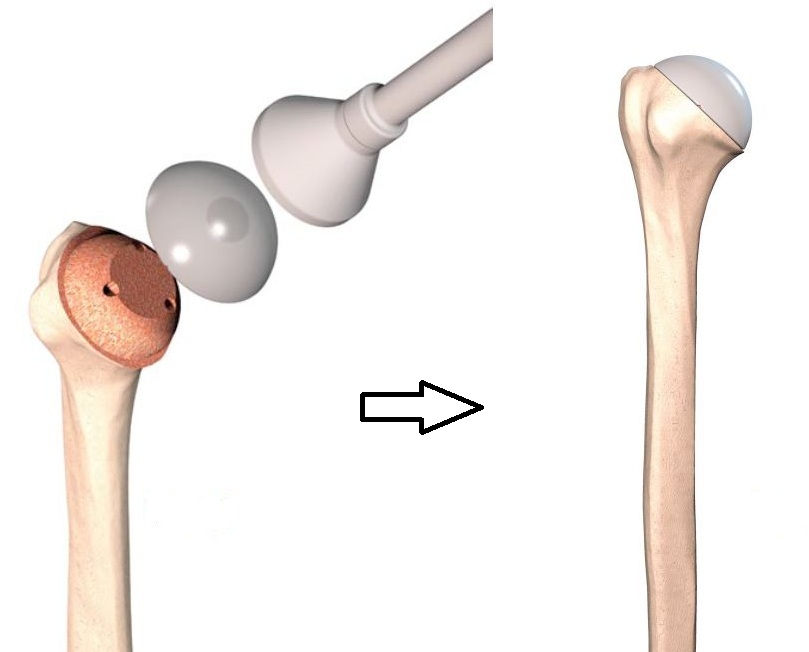
setting up a resurfacing cup:
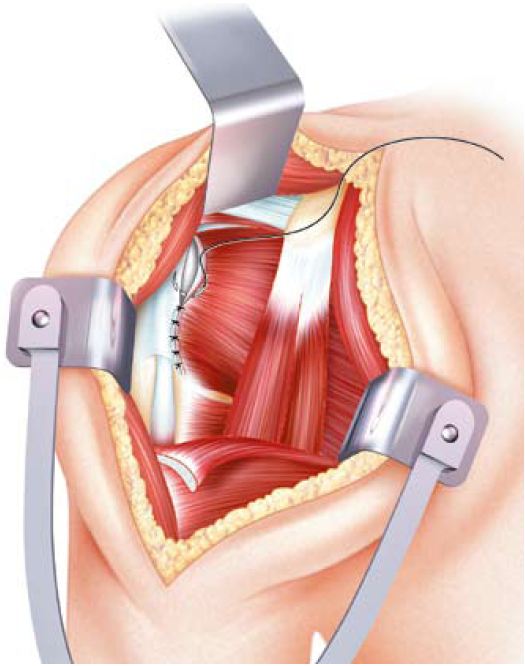
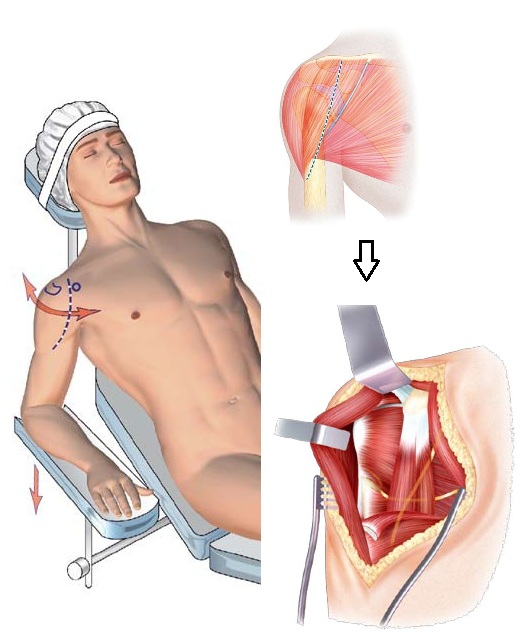
The patient is placed in a half-sitting position, the approach is delto-pectoral (passage between the deltoid and the pectoralis major, dotted green of the diagram). The complete exposure of the humeral head conventionally requires the section of the subscapularis tendon (variants exist not to damage this tendon).
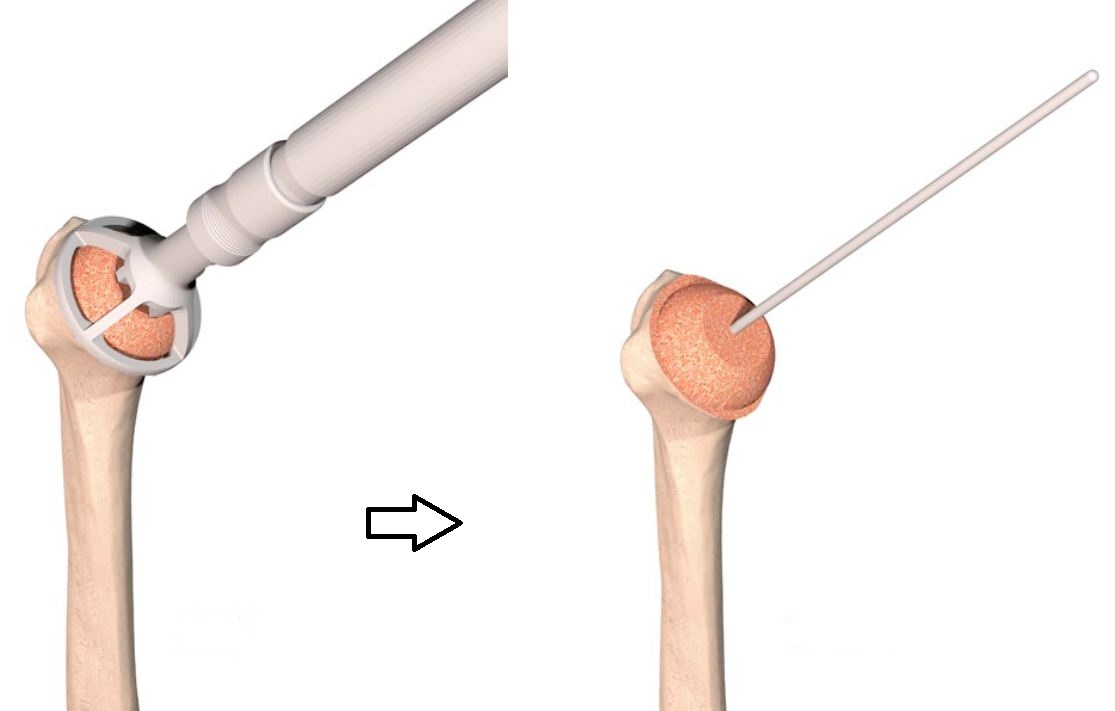
The head will be measured to determine the appropriate size of prosthesis.
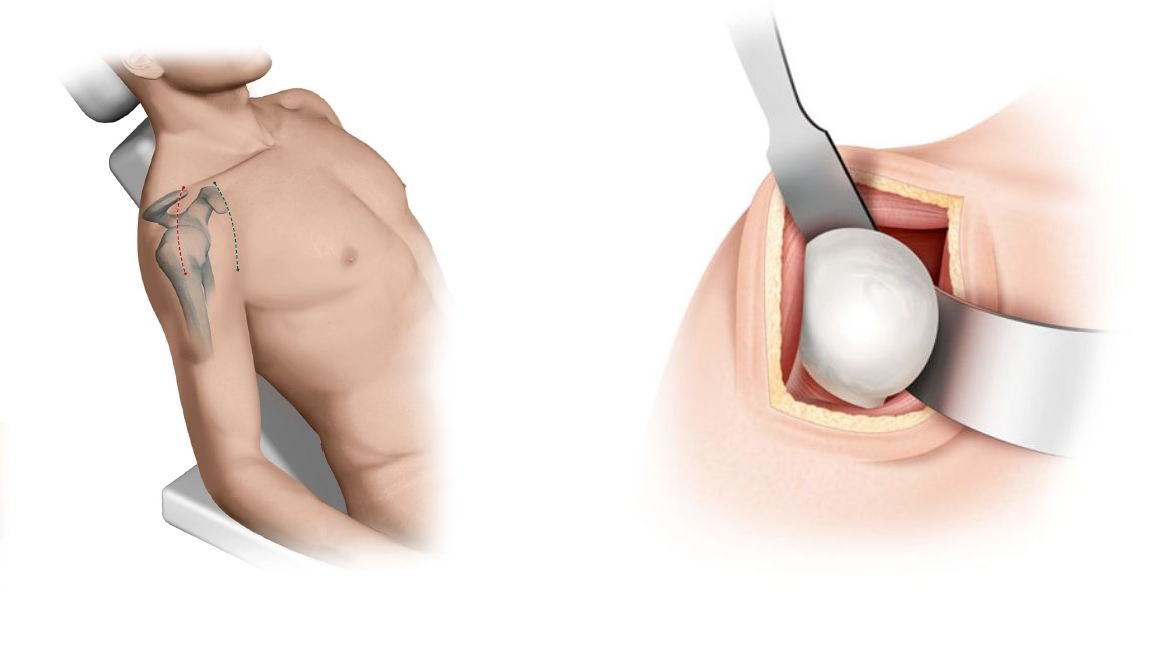
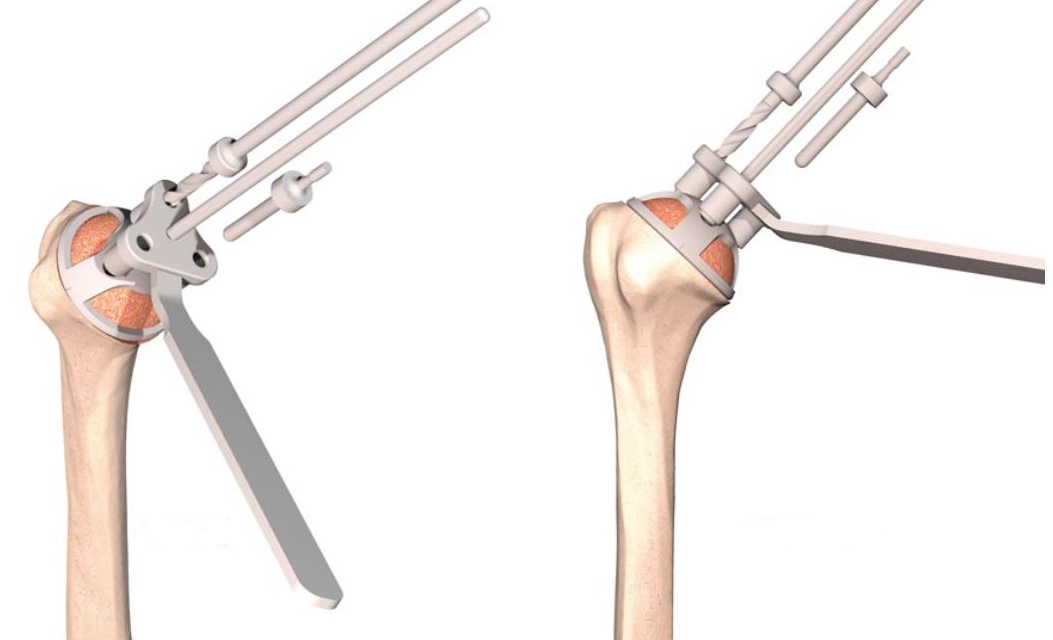
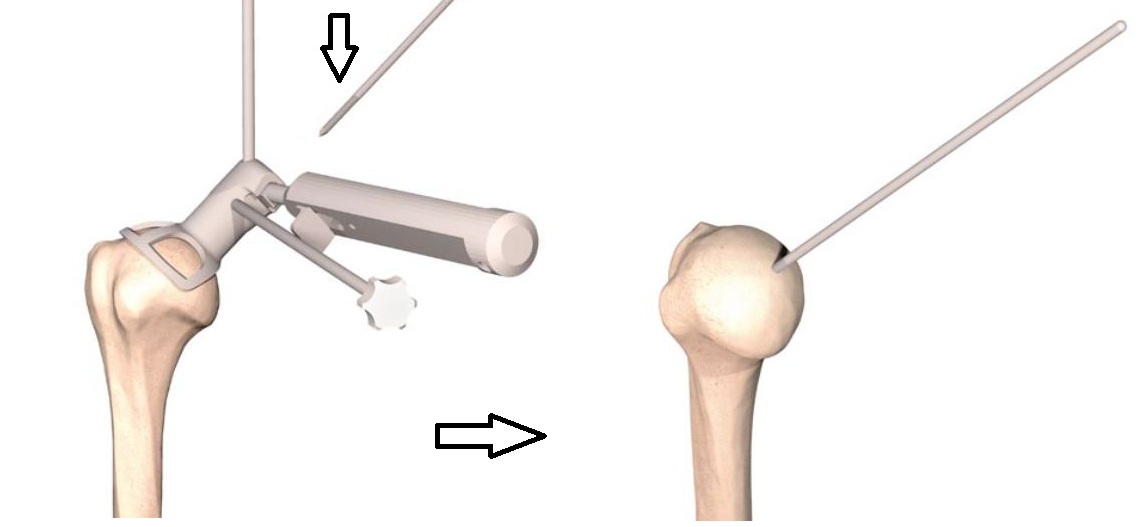
Once the head is properly exposed, including the exact position of the anatomical neck of the head (removal of osteophytes), a guide is set up to position more accurately a pin that will condition the final position of the cup (essential step ).
This guide makes it possible to check the axis of the humerus (upper bar) and the retroversion of the head by 20 degrees (front bar parallel to the forearm).
Then the closure will include the repair of the tendonsous-scapular using trans-osseous wires, anchors or tunnels.
Generally the tendon of the long biceps is severed and sometimes tenodesized at the humerus during the implantation of a prosthesis.
Closing of the skin, aspirational redon for 24 to 48 hours, rest of the arm in a scarf or a Dujarrier for 3 to 4 weeks
Suites: Passive and immediate kinetic therapy avoiding external rotation that pulls on the subscapularis suture
Variants
This prosthesis can according to the case and the practice of the surgeon to be the object of a gesture on the glenoid
– avasting the bone with a strawberry
– cover promotes sliding and reduces residual pain due to lack of implant
- the adjacent joint capsule,
- a tissue taken from the thigh, such as the fascia lata aponeurosis,
- or even a specially designed artificial fabric.
– Or realization of a total prosthesis by placement of an implant (cemented in general, see page on the total anatomical prosthesis
Simple humeral prosthesis
The patient is placed in a half-sitting position, the approach is delto-pectoral (passage between the deltoid and the pectoralis major). The interval between the two muscular bodies is easily found because of the passage of the cephalic vein.
After pulling the Deltoid muscles out and the big Pectoral inside, Coraco-Biceps tendon (attached to the coracoid) is reached within and tendon and subscapularis muscle deep down.
A bi-valved retractor is put in place to allow the operative aid to spread further later.
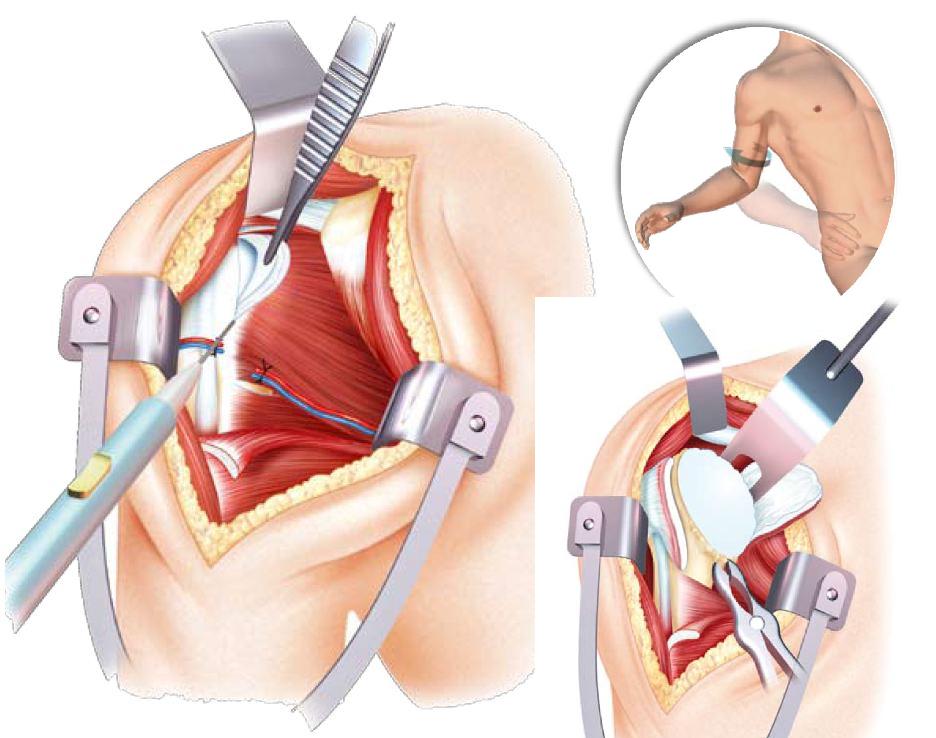
The articular approach generally requires the section of the tendonsous-scapular (which will be repaired at the end of the procedure) and the ligature of the anterior circumflex vessels of the humerus. The humeral head can be exposed by performing an external rotation of the arm. which allows to find the limits of the anatomical neck of the head (requires the osteophyte ablation using a gouge pliers represented on the diagram of right and bottom)
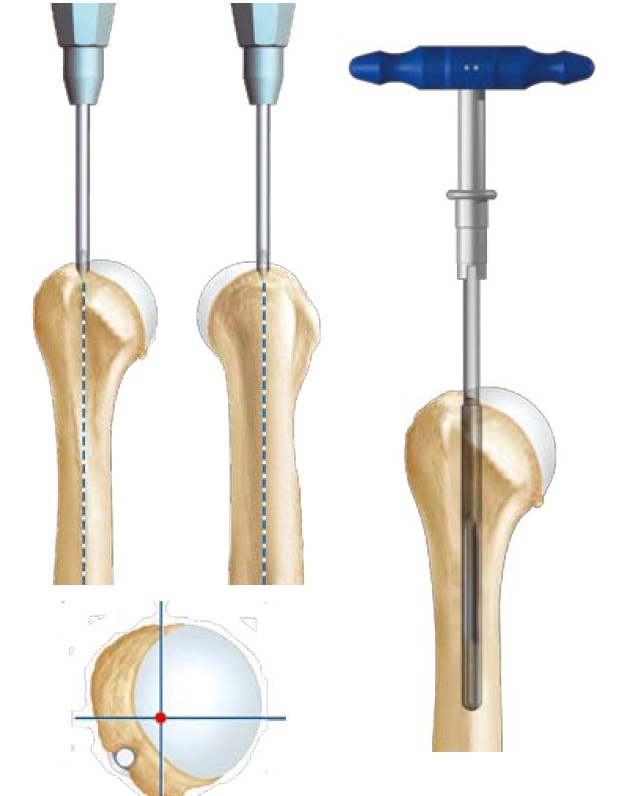
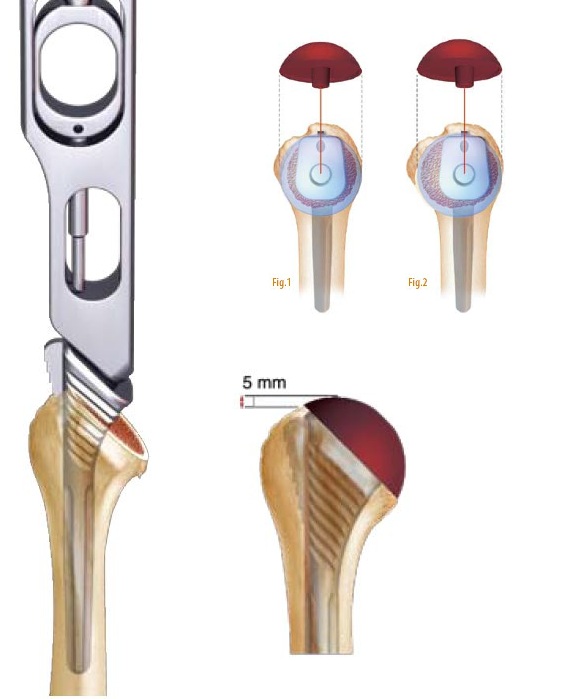
Trepanation of the humerus to find the axis of the medullary canal (hollow) of the humerus. Installation of the reamer (surmounted by the blue handle) which allows to work the canal to the correct diameter and allows the introduction of the cutting guide.
This material made by the ‘ancillary’ prosthesis (all tools and instruments that allow the installation of a prosthesis); it is specific for each prosthesis.
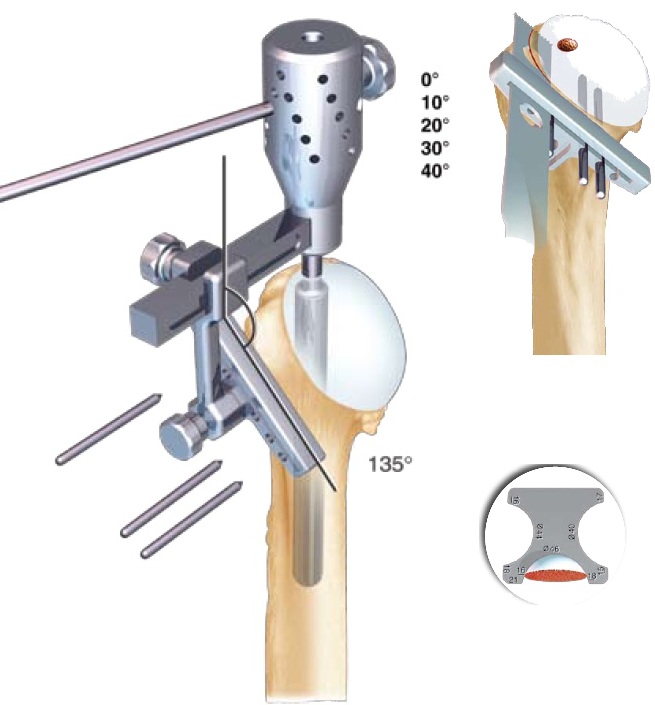
Fixation of the cutting guide in general with a retroversion of 20 to 30 degrees (corresponds to anatomical retroversion of the head) then osteotomy of the head using an oscillating saw.
Once the head is removed, it will be measured to define the correct metal head size.
Once the humerus has been cleared of its head, test probes and stems are used to select the correct sterile final implant size.
The adapted size has most often been evaluated on preoperative radiographs using prosthesis rod layers.
The stem is common to all prosthetic configurations (humeral simple, anatomical, inverted). It is called ‘modular’.
The configuration of each humerus differs and the portion of the sphere should cover the bone section slice as best as possible so as not to conflict with the tendons of the cap.
Figure 1: case of a configuration requiring a centered head
Figure 2: case of a configuration requiring an eccentric configuration with essentially anterior coverage (close to the relief of the small tuberosity)
Once the choice of metal head is made, the implants are opened sterilely (stem and humeral head).
The impaction of the stem is done if possible without cementation by surgical cement, then a graft of the metaphyseal zone of the humerus (broad part under the head) is carried out or the stem is covered with an osteo-integrable layer (allows to cling to the bone). The necessary cancellous bone is taken from the hollow of the removed humeral head.
A cement seal is preferable in the elderly person or in case of average primary holding of implants.
The humeral time is finished, the intervention is finished if it is a partial prosthesis. If it is a total anatomic prosthesis, there is the time to resurface the glenoid (which is performed before the final sealing of the implants in the humerus).
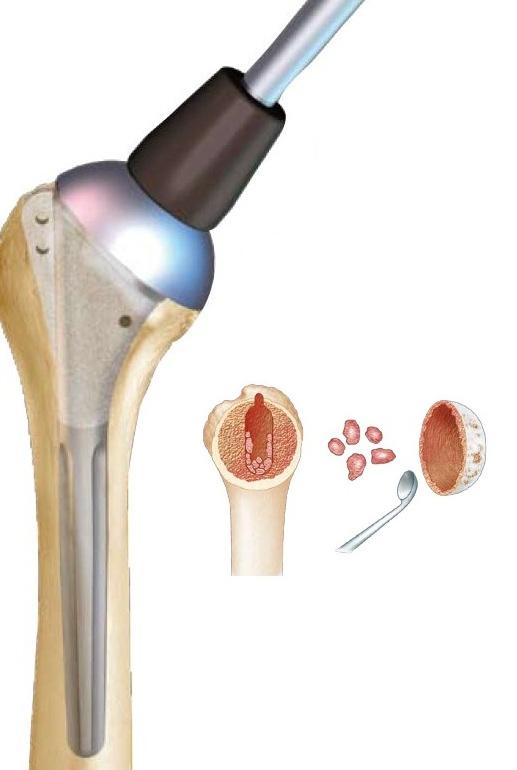
The closure obviously includes subscapular tendon repair because this type of prosthesis requires a functional rotator cuff. The repair sometimes involves the use of anchor as a tendon repair of the cap.
In general, tenodesis tenotomy of the long biceps is performed at the same time to reduce the risk of residual pain.
If necessary (loss of initial external rotation) a plasty between the subscapularis tendon and the capsule can be performed in order to recover a passive and active external rotation.
The closure is done either by staples or resorbable son on suction drain which remains in place in general 48 hours.
