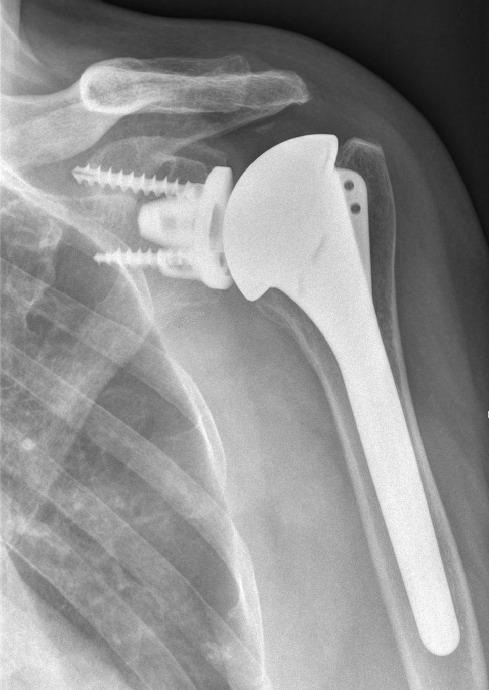
An anatomical prosthesis involves two stages:
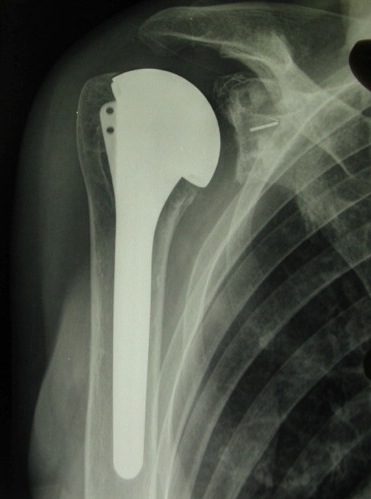
the replacement of the humeral head
by a portion of solid sphere (or hollow in some cases including a resurfacing of the head) fixed on a rod introduced into the medullary cavity of the humerus.
This time is identical to a partial humeral prosthesis or resurfacing
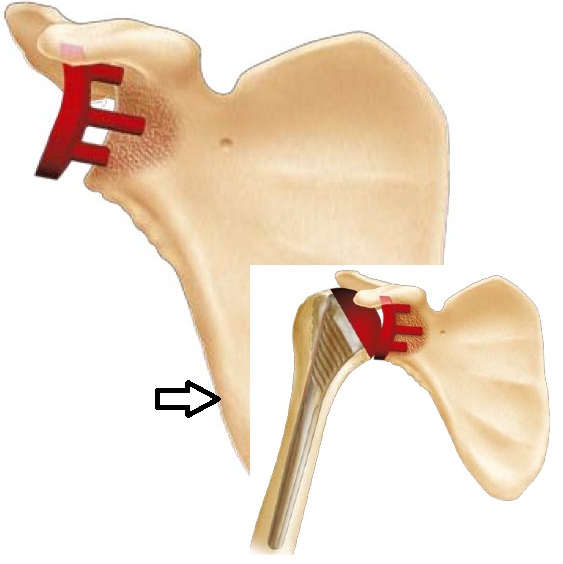
resurfacing of the glenoid by a plastic part (polyethylene or PE)
– PE directly cemented into the glenoid
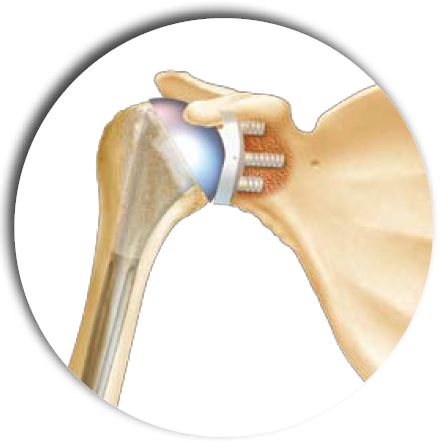
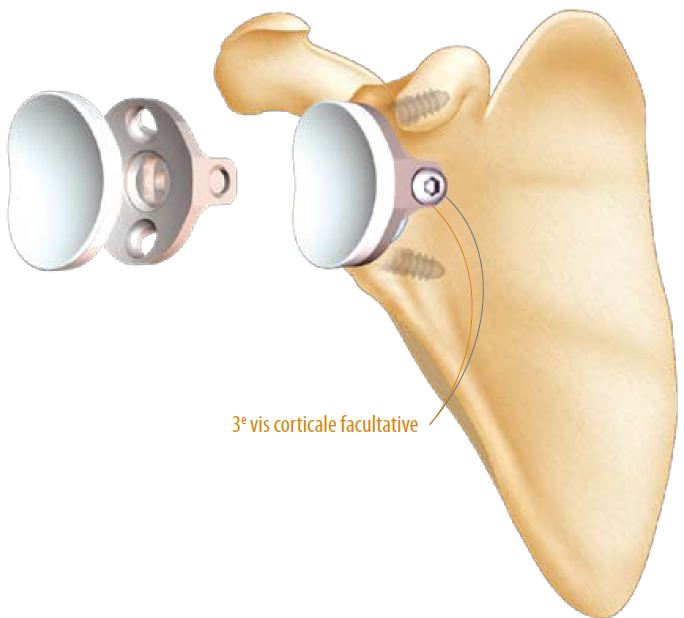
– Or PE fixed on a metal implant impacted and screwed into the glenoid (‘metal-back’).
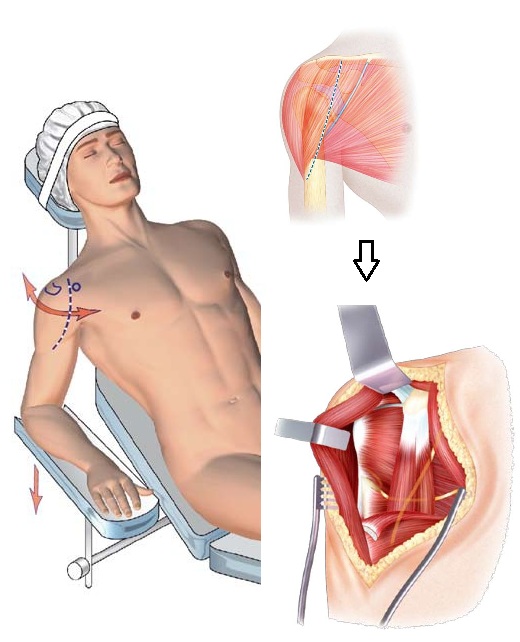
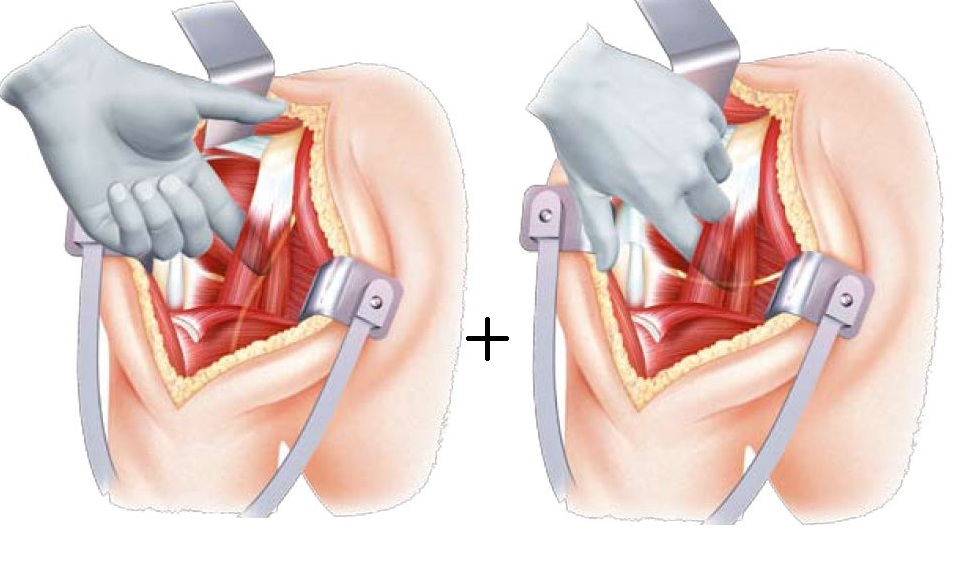
To avoid stretching or damaging the musculocutaneous nerve, it will be palpated under the coraco-biceps joint tendon. Its motor role allows the bending of the elbow.
The other nerve nearby is the axillary nerve, palpated in the lower region of the glenohumeral joint. Its driving role is the abduction of the arm through the deltoid muscle.
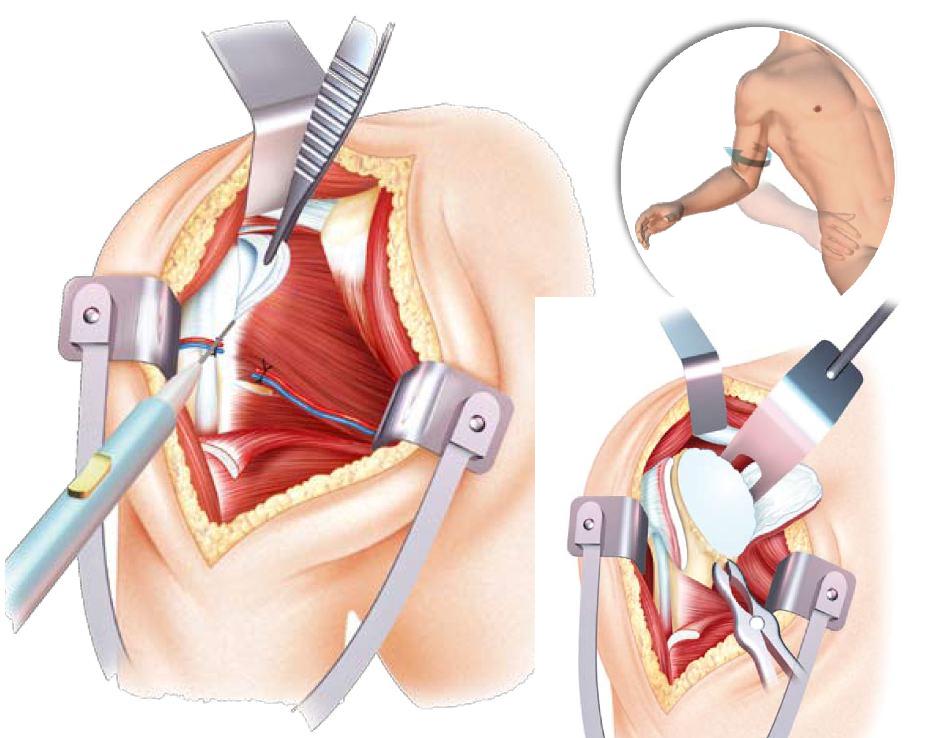
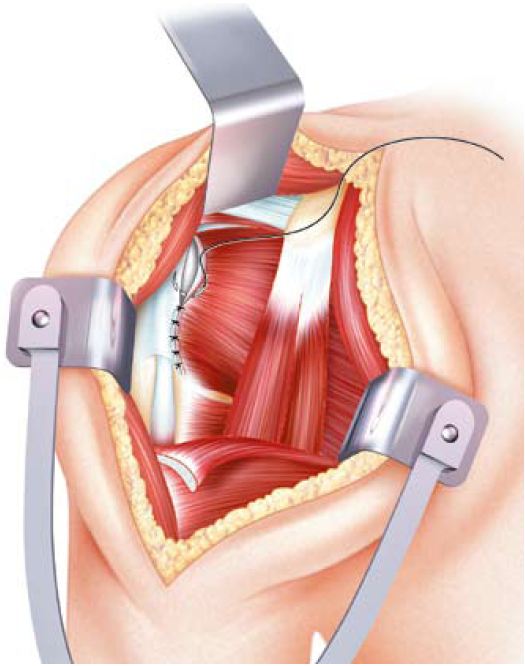
- The articular approach generally requires the section of the subscapularis tendon (which will be repaired at the end of the procedure) and the ligature of the anterior circumflex vessels of the humerus.
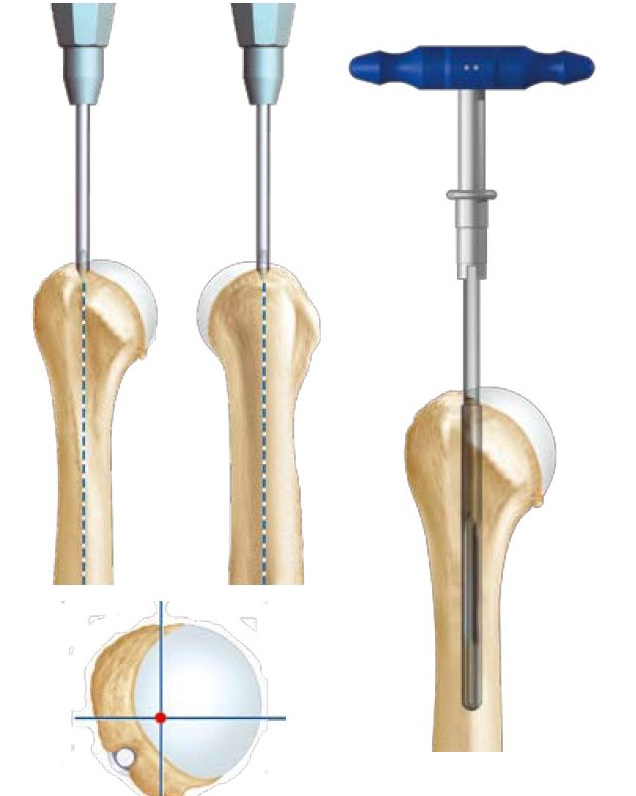
The humeral head can be exposed by performing an external rotation of the arm, which allows to find the limits of the anatomical neck of the head (requires removal of the osteophytes with a gouge pliers shown in the diagram on the right and below)
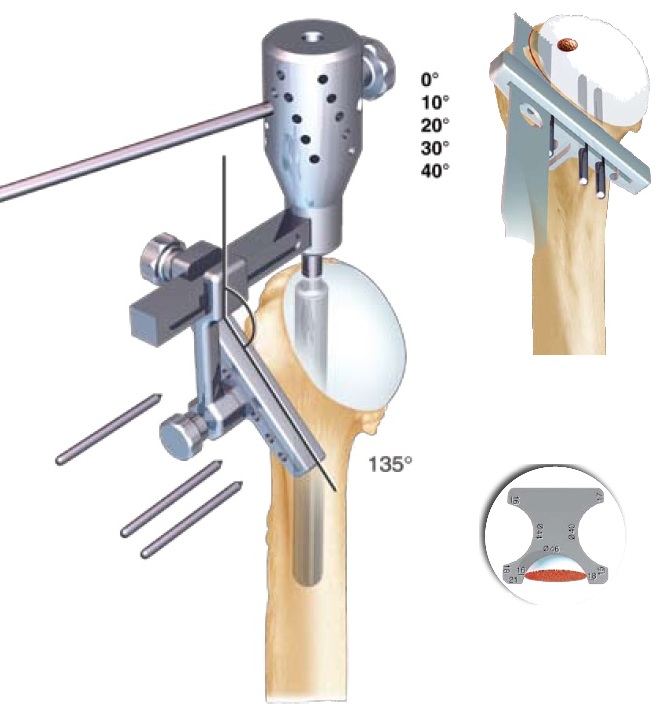
Trepanation of the humerus to find the axis of the medullary canal (hollow) of the humerus. Installation of the reamer (surmounted by the blue handle) which allows to work the canal to the correct diameter and allows the introduction of the cutting guide.
This material is made by the ‘ancillary’ prosthesis (all tools and instruments that allow the installation of a prosthesis); it is specific for each prosthesis.
Fixing of the cutting guide in general with a retroversion of 20 to 30 degrees (corresponds to the anatomical retroversion of the head) then ostetomy of the head using an oscillating saw.
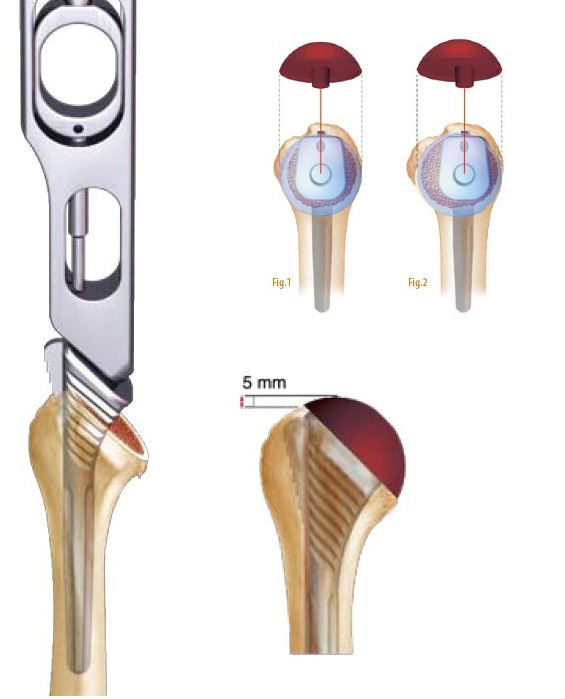
Once the head is removed, it will be measured to define the correct metal head size.
Once the humerus has been cleared of its head, test probes and stems are used to select the correct sterile final implant size.
The adapted size has most often been evaluated on preoperative radiographs using prosthesis rod layers.
The stem is common to all prosthetic configurations (humeral simple, anatomical, inverted). It is called ‘modular’.
The configuration of each humerus differs and the sphere portion should best cover the bone section slice so as not to keep a metal edge that could conflict with the tendons of the cap.
Figure 1: case of a configuration requiring a centered head
Figure 2: case of a configuration requiring an eccentric configuration with essentially anterior coverage (close to the relief of the small tuberosity)
Once the choice of metal head is made, the implants are opened sterilely (stem and humeral head).
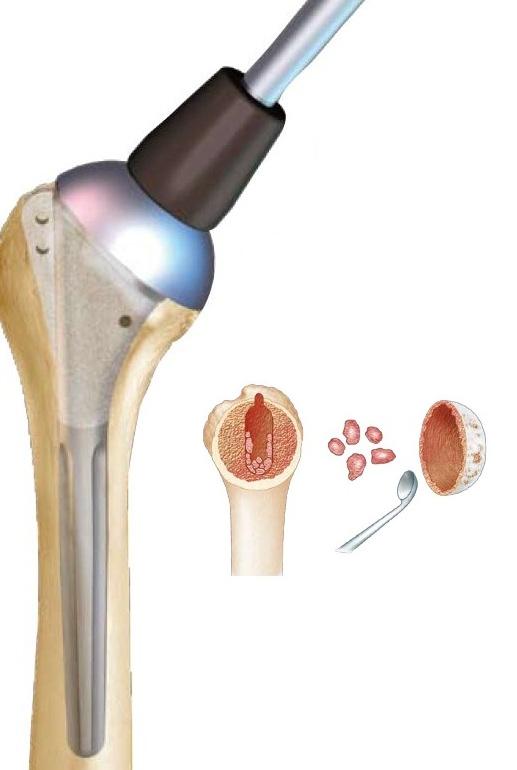
The impaction of the stem is done if possible without cementation by surgical cement, then a graft of the metaphyseal zone of the humerus (broad part under the head) is carried out or the stem is covered with an osteo-integrable layer (allows to cling to the bone). The necessary cancellous bone is taken from the hollow of the removed humeral head.
A cement seal is preferable in the elderly person or in case of average primary holding of implants.
The closure obviously includes subscapular tendon repair because this type of prosthesis requires a functional rotator cuff. The repair sometimes involves the use of anchor as a tendon repair of the cap.
In general, tenodesis tenotomy of the long biceps is performed at the same time to reduce the risk of residual pain.
If necessary (loss of initial external rotation) a plasty between the tendon and the capsule can be performed to recover a passive and active external rotation.
The closure is done either by staples or resorbable son on suction drain which remains in place in general 48 hours.
Placement of polyethylene cement (PE) cemented on the glenoid
Glenoid time requires exposure of the glenoid, a very important time because the vision of this bone surface is relatively limited and causes difficulties in appreciating the axis and the actual limits of the surface area for receiving an implant (especially there are many osteophytes or parrot beaks that mimic the surface of the glenoid.
In general this time requires the section or even the resection of the bead and the joint capsule.
Several bent spacers are positioned at the neck of the scapula and facilitates exposure of the glenoid
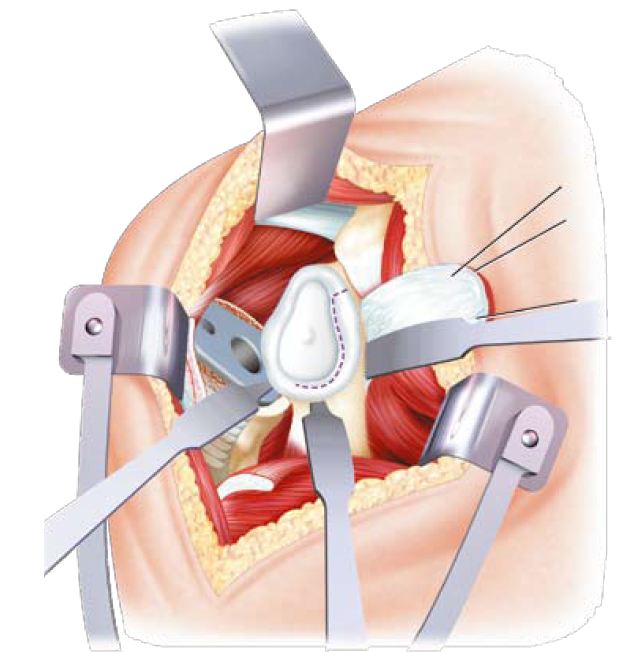
Once the glenoid properly exposed, and taking care of its anteroposterior axis (retroversion or anteversion); its center is located to create a first tunnel which is then used as a guide for the glenosis of the glenoid, this is the most important time in order to correctly place the definitive implant and to avoid any rapid loosening factor or fracture of the glenoid
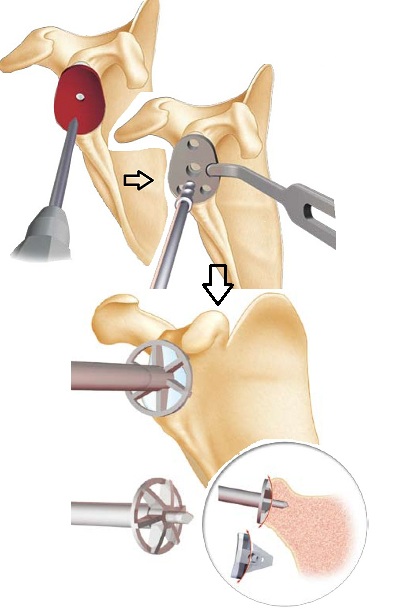
Glenarization is done using a rotary bur driven by a surgical motor. The goal is to reach the subchondral bone (under the cartilage) and create a concave surface identical to the shape of the PE implant.
Then we complete the creation of the blind tunnels that will receive the PE implant pads.
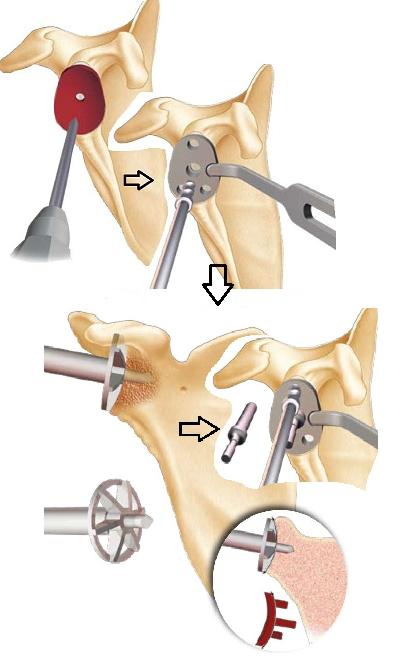
Sealing the PE implant always requires the use of a surgical cement sometimes containing an antibiotic (including Gentamycin).
It is actually a resin that cures by polymerization in contact with the ambient air, a reaction that releases heat.
The cement is introduced still liquid in the tunnels provided for each stud (5 on the drawing of the PE we use).
The final implant is then impacted and maintained until the cement has completely hardened.
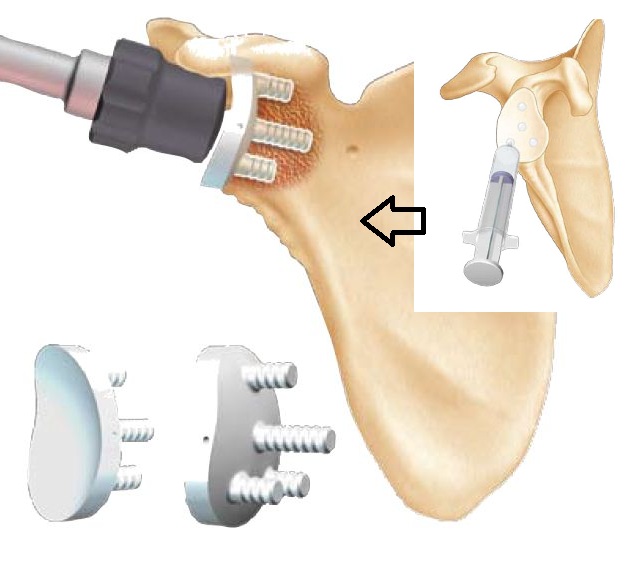
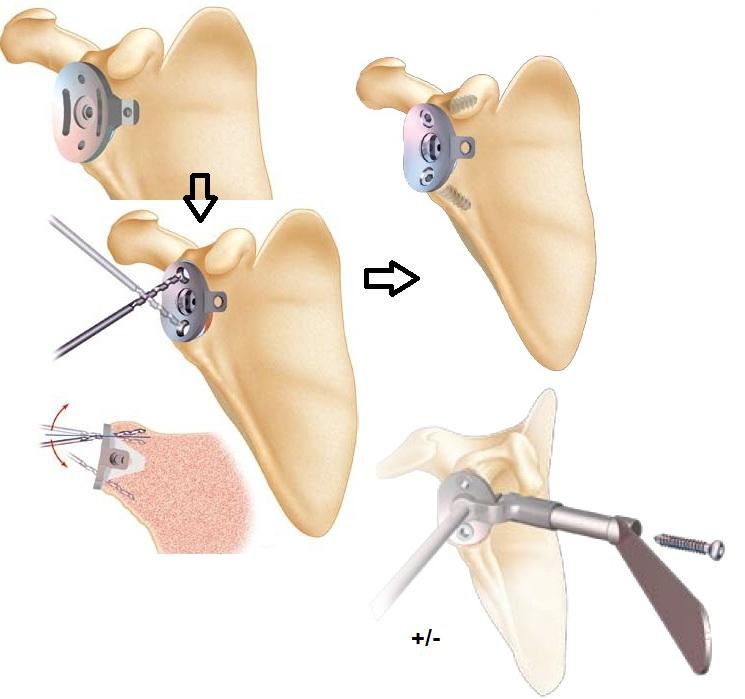
Installation of a metal-back glenes with polyethylene
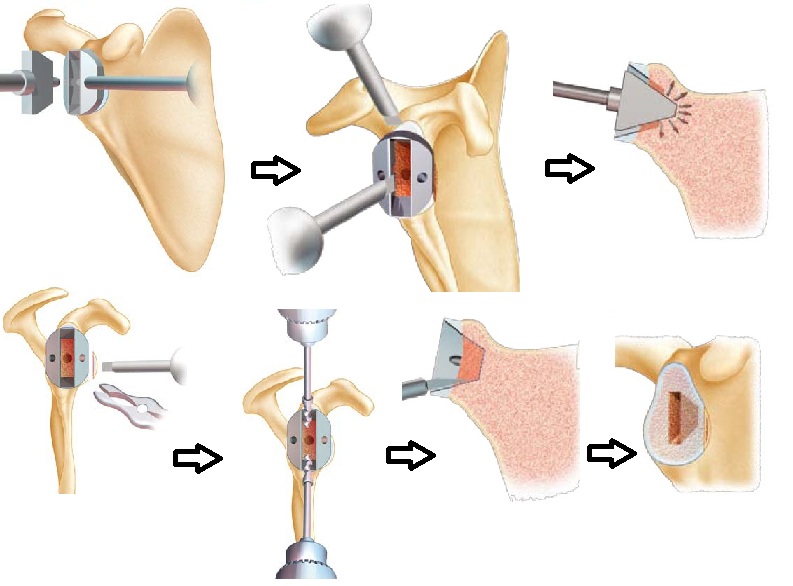
The preparation sequence begins as the PE implant technique, wicking the central hole and milling the glenoid so as to be at the level of the subchondral bone and to obtain a concave surface (because the metal-back implant is also concave on the level of its deep face).
The following is different in that the metal-back is anchored in the glenoid by a keel, which requires the preparation of a formwork adapted exactly to the keel.
Below are summaries of the steps necessary for the realization of the formwork.
This step is the most delicate because it is imperative to apprehend the anatomical variations of the glenoid (retroversion, anteversion, asymmetrical wear, loss of substance etc …) otherwise the implant will not hold …
